I have a very nice walnut slab that I plan to make into a coffee table. I flattened this slab right on my workbench! I am happy to say that flattening a slab of wood with a router was even easier that I thought it would be! Not only was it easy, but the results were great! This is one of those tasks where an adjustable height workbench came in very handy because setting it to a very low height made it easier to reach across when moving the router across the slab.
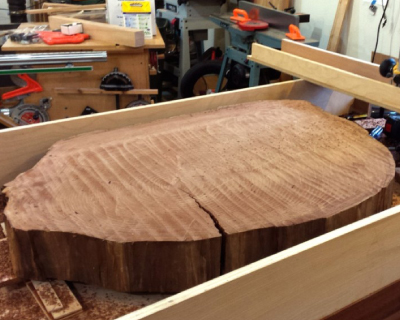
Walnut slab right before flattening
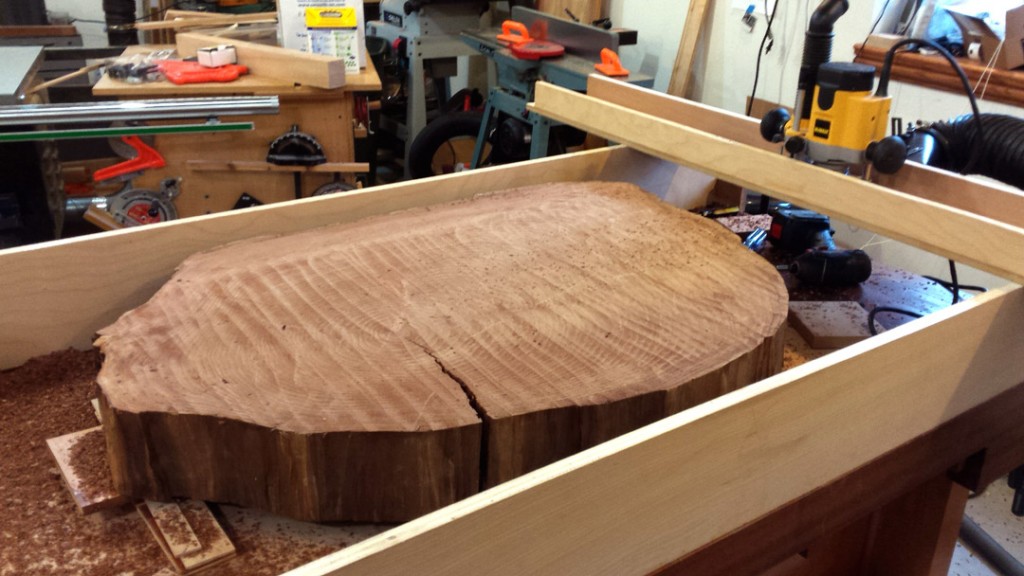
The slab is a slice out of a tree, some people call this a “cookie”. The dimensions are 26″x38″ and it started out 4-1/2″ thick on one end and 5-1/2″ thick on the other end. I like that it is thicker on one end that the other, I think it will add to the rustic look of the slab coffee table. Keeping it thicker on one end probably made the flattening process easier because I didn’t have to remove as much wood as I would have to make the faces parallel to each other.
The essential steps in flattening a slab with a router are simple:
• Level the top surface of the slab
• Place guide runners on two sides of the slab
• Move a router on a sled back and forth across the runners to flatten the slab
Following is a more detailed explanation!
Level the top surface of the slab
Generally, you want to remove the least amount of wood to create a level surface on the face of the slab. Your slab might be high in the middle, high on one end, or high on all sides and low in the middle. In my case the slab was low in the middle on one side and high in the middle on the other side. I placed small blocks of wood under one end and checked the top of the slab with a level. On the side that was high in the middle I adjusted the blocks until the gaps at each end of the level were about equal to each other.
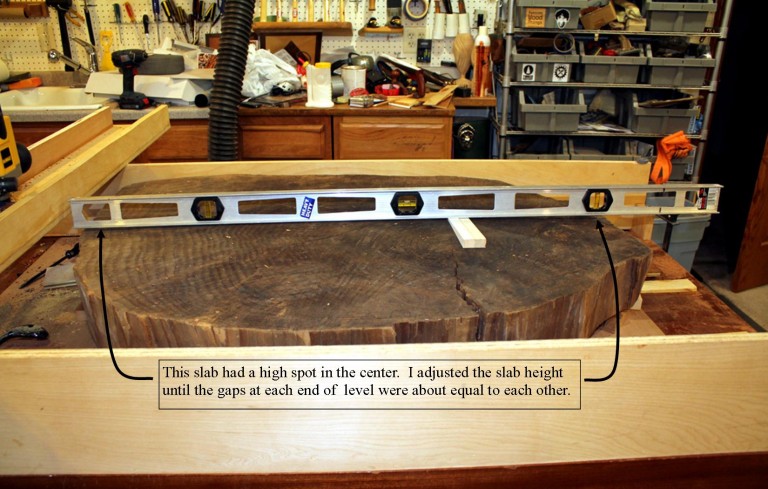
This side of the slab had a high spot in the center. I adjusted the slab until the gaps at each end of the level were about equal to each other
Place guide runners on two sides of the slab
The guide runners are simply two straight boards that the router sled rides on. I made mine out of 3/4″ plywood. This part was easy partly because my workbench is wider than the slab. If your slab is wider than than your bench then you will have to find a way to mount the runners along side the slab.
Since most router bits are less than 2″ long, you will need your router to ride fairly close to the slab. My slab was about 5-1/2″ thick so I made the runners 6-1/2″ tall.
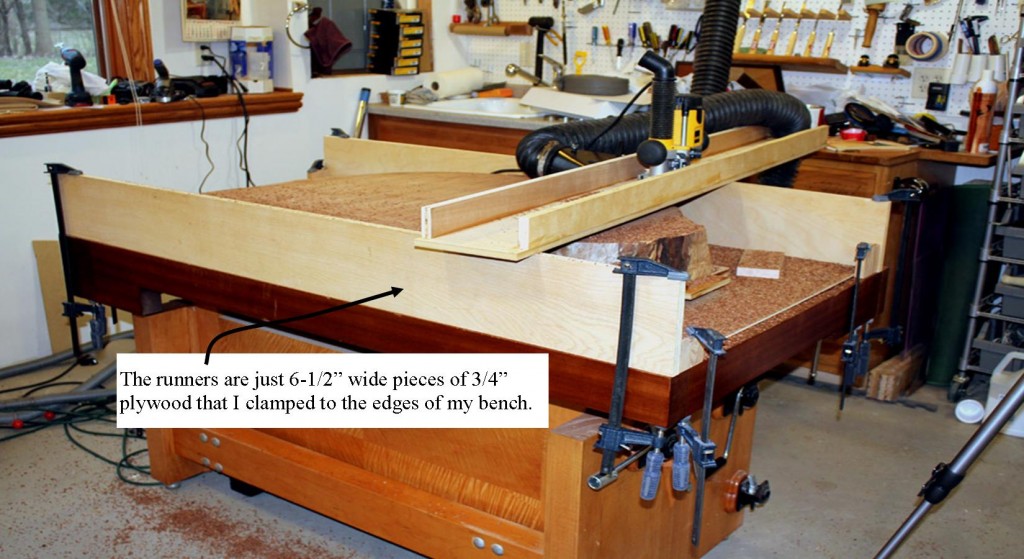
The runners are 6-1/2″ wide pieces of 3/4″ plywood that I clamped to the edges of my bench.
I didn’t want to take a chance on the runners falling off while I was routing to top of the slab! So, I glued small blocks on the ends to give myself another place to clamp them down. They were much more secure with these blocks and the extra clamps.
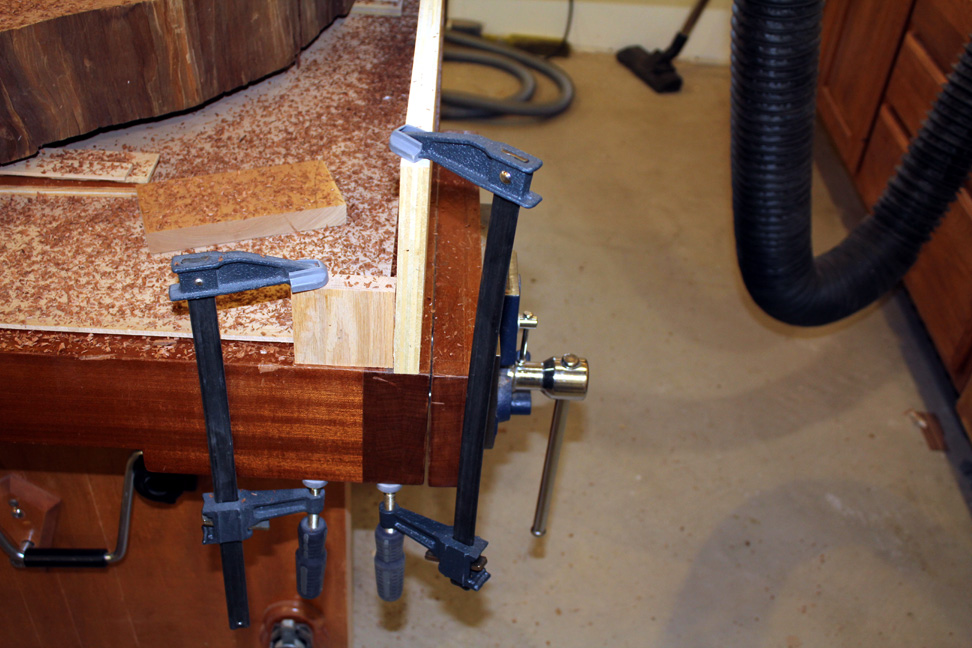
Blocks glued to the ends of the runners aided stability and added another place to clamp them down
The router and router bit
You can use any router with a 1/2″ collet, but it will be easier to adjust the depth with a plunge router. I like the DeWalt 621 router so much that I have 3 of them, but really any good plunge router will be just fine.
You will need a straight router bit that is at least 1-1/4″ long, but preferably one that is 1-1/2″-2″ long so that it is long enough to reach through the sled and still be able to trim the slab. There are specialized surface planing bits, but a regular straight mortising bit will be just fine.
Flattening with go faster and you will get a cleaner finish with a wide bit. The bit I used for this slab was 1-1/8″ wide and it worked great. I wouldn’t go much bigger than that for safety reasons. Speaking of safety, remember to slow your router speed down whenever you use a bit that is more than 1″ wide.
Here are the recommended speed ranges for various sized router bits.
• Up to 3/4″ height=”683″ />22,000 rpm
• 1″ 18,000 rpm
• 1-1/2″ 16,000 rpm
• 2″ 15,000 rpm
• 3″ 12,000 rpm
• 3″ or more 10,000 rpm or less
The router sled
The router sled is just a U shaped box. I made the bottom out of some 1/2″ melamine that I happened to have. I chose 1/2″ material to maximize the available plunge depth, and I chose melamine because it would slide easier than raw plywood. For the sides on this sled I glued a few pieces of 3/4″ plywood that were 2″ wide, these kept the sled stable and flat.
I drilled a hole in the center of the sled and bolted the router in place. The reason I did this is because it is easier to move the whole sled back and forth than it is to reach across and move the router. It is also easier to build a sled with a hole in the middle than it is to make one with a slot all the way across. Since I was going to move the entire sled back and forth the sled needed to be at least twice as long as the space between the runners. My workbench is 32″ wide so I made the sled about 64″ long.
It was sometimes kind of hard to see exactly where the bit was cutting. To make it easier I drilled a 1-1/2″ “window” in the bottom of the sled next to the router.

1-1/2″ hole in bottom of sled made it easier to see exactly where I was routing.
Dust Collection
I attached a 4″ dust hood directly on the sled directly behind the router. I then attached a flexible hose from the hood to one of the lines on my dust collection system. This wasn’t perfect, but it collected about 80% of the dust.
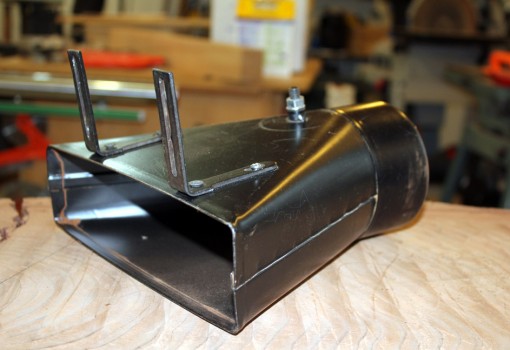
4″ dust hood screwed to sled right behind router
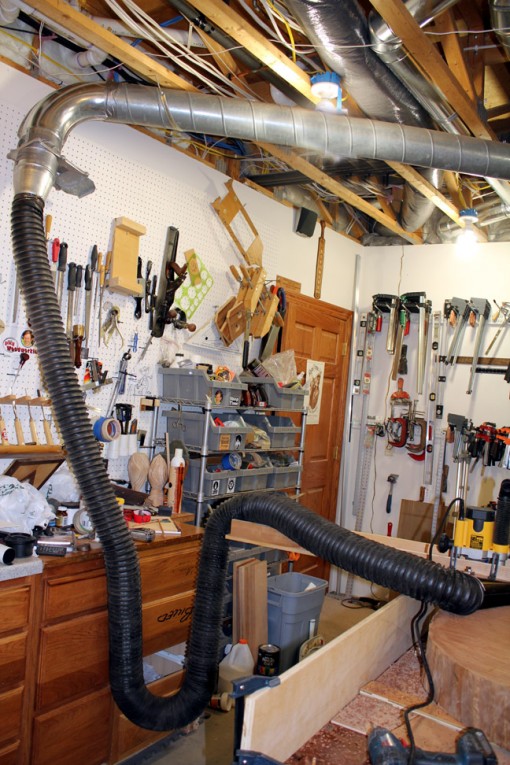
Flexible 4″ dust collection hose connected to DC system
Routing
I used a “climb cut” when I flattened the slab to reduce tear out and to direct the chips into the dust hood. Climb cutting simply means moving the router in the same direction as the cutter.
CLIMB CUTTING CAN BE DANGEROUS BECAUSE YOU CAN LOSE CONTROL OF THE ROUTER OR THE PIECE BEING ROUTED!! However, due to its mass there was little chance of the slab uncontrollably jumping off the bench. And, with the weight of the sled and the fact that the walnut was fairly soft there was little chance that I would lose control of the router either.
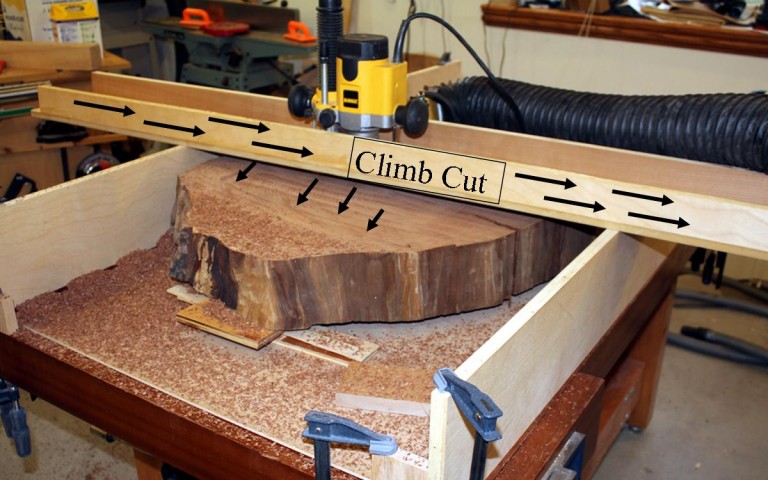
Pulling the router in the direction of the arrows will result in a climb cut
That said, PLEASE DO NOT USE THE CLIMB CUTTING METHOD UNLESS YOU ARE FAMILIAR WITH IT! There is not enough room in this blog post to go into much more detail about climb cutting, but there are excellent explanations about it on the internet.
This walnut slab cut very easily. I took off about 3/8″ of material on the initial passes, but on the final pass I reduced that to about 1/8″ to improve the finish.
One other tip is that adding wax to the top of the runners will make much it easier to move the router sled.
Finishing up
I am very happy with the results of using a router on this slab! It just needs a little cleaning up (including repairing the crack!) and it will be ready for a finish. Please don’t hesitate to contact me if you have any questions about this!
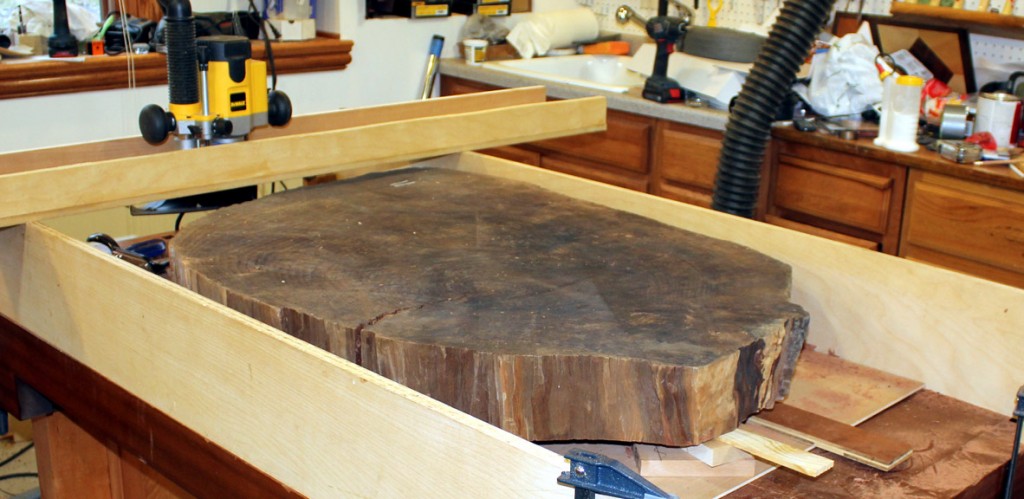
Here is how the slab looked right after I finished flattening with the router

